
Last year I wrote about Azure SQL Database extended events (https://blobeater.blog/2017/02/06/using-extended-events-in-azure/) and gave an example where I was capturing deadlocks via the ring buffer. Ever since then I wanted to do a follow-up post but using Azure storage as the target for my XEL files.
This is more complicated than using the ring buffer as the target and requires a couple of things:
- Azure storage account where you create a dedicated container for the files.
- SAS key.
- Database master key.
- Database scoped credential.
Azure Storage
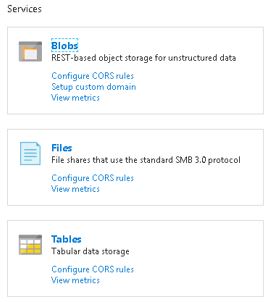
I decided to create a new storage account then a container within the account. To do this you navigate to the “Blobs” section shown below then click the add container option.
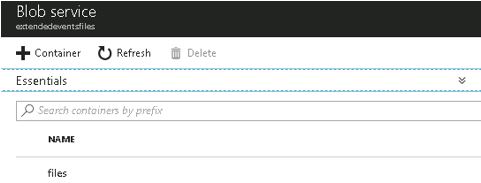
My files container as shown below.
Next I navigate to the settings section of the storage account and find the shared access signature option.

Here you will need to setup the permissions allowed to what services, IP addresses and give a start and expiry time.

Once you have tweaked this to YOUR requirements select the generate SAS blue button. This will give you something like (I have obfuscated the true SAS):
?sv=2023-07-29&ss= &se=2023-05-07T15:57:09Z&st=2018-05-02T07:57:09Z&spr=https,http&sig=svu9SdFSELLOSHANEMdD3D
This is really important and will be needed in the upcoming steps.
Everything Else
The rest is TSQL. At a high level we will create a database master key then a database scoped credential where its secret is the SAS we generated from Azure storage (all obfuscated).
Then we will be able to create an extended event session where the target is the storage account container. All this code needs to be executed within the user database.
Read the comment line – the secret starts AFTER the ? from the above SAS.
 CREATE MASTER KEY ENCRYPTION BY PASSWORD = 'mv8f5D24DdQLAL0C34CsA96E3FC346'

CREATE DATABASE SCOPED CREDENTIAL

        [https://extendedeventsfiles.blob.core.windows.net/files]
    WITH
        IDENTITY = 'SHARED ACCESS SIGNATURE',  -- "SAS" token.
        -- Paste in the long SasToken here for Secret BUT AFTER the ? only
        SECRET = 'sv=2023-07-29&ss= &se=2023-05-07T15:57:09Z&st=2018-05-02T07:57:09Z&spr=https,http&sig=svu9SdFSlLFFgdsp39Sf15ZsdsdHELLOSHANEM4%DDfssdD3D'
    ;
GO
Next the extended events session, here I am capturing deadlocks.
CREATE EVENT SESSION azure_monitorV2
ON DATABASE

ADD EVENT sqlserver.sql_statement_completed
( ACTION (sqlserver.sql_text,sqlserver.database_name)),
ADD EVENT sqlserver.database_xml_deadlock_report

    ADD TARGET
        package0.event_file
            (

            SET filename =
                'https://extendedeventsfiles.blob.core.windows.net/files/code.xel'
            )
    WITH
        (MAX_MEMORY = 50 MB,
        MAX_DISPATCH_LATENCY = 3 SECONDS)
    ;
GO
When you start the session you do not want to see red error messages – if everything goes well you should see the file within your storage container.
ALTER EVENT SESSION azure_monitorV2
ON DATABASE
STATE = START;

That’s great – but querying the file is most important.
 SELECT
        object_name,file_name,timestamp_utc,
        CAST(event_data AS XML) AS [event_data_XML]
    FROM
        sys.fn_xe_file_target_read_file
            (

                'https://extendedeventsfiles.blob.core.windows.net/files/code',
                null, null, null
            ) WHERE object_name = 'database_xml_deadlock_report';
GO

Click the XML to give you the deadlock information.

Thanks for reading.

Pingback: Writing Extended Events To Blob Storage – Curated SQL
Pingback: Plataforma de Dados no Microsoft Azure: SQL Server em IaaS parte 3 – Blog do Paulo Daniel Nobre
Pingback: Azure SQL Database – Who Changed My Auto Tuning Settings? | All About SQL